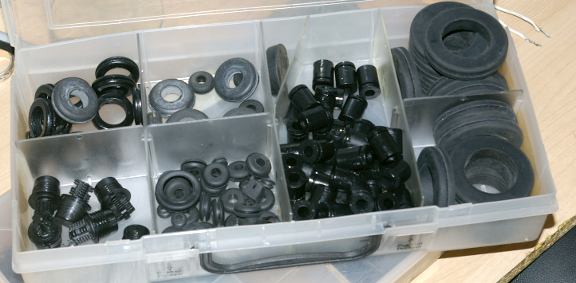
Transformers, Grommet!
Yes, whenever you mount transformers to a chassis, always have plenty of rubber grommets to protect the wiring insulation from abrasion, cuts, and short-circuiting! Especially with high voltage stuff.
First Transformer goes on the Chassis! Output tranny at one end, and power supply trannies and chokes at the other. Orientation aint so critical with this incredibly long chassis.
I always seem to be short of lock-washers. Ideally locknuts would be even better, but hey, we'll be using what is on hand for this economy build. When you run out of washers, you can always use nail-polish to fix nuts from loosening, that are never supposed to come off again. Transformers are one of those parts that should never die!
Here my son is drilling the holes for the massive choke (larger than the Power Tranny!). We had to check for clearance with the speakers in the Fender cab.
After this quick training exercise, my son is now a professional Grommeter!
It first seems impossible to stuff correct-size grommets into the hole, And in the past I've even cut them to assist in tucking them in. But the best tool for this is simply a medium flat-head screwdriver. You have to watch it, so that the rubber isn't penetrated or torn, since that defeats the whole (hole) purpose of protecting the wires from contact with sharp metal edges, and also providing electrical insulation.
Power Plug Innovations:
Next we want to get the power chord installed. But here, instead of the usual fixed line, we want the new 'computer-plug' style. There are several good reasons to go this route:
(1) If the chord is damaged, its an easy replacement, without tools!
(2) You can change the length of the power cord, if you want to add a longer one!
(3) There is built-in powerline filtering in most of these units, which is pretty essential these days with tons of digital broadcast noise all around, (cells, internet etc.) and all kinds of equipment piggy-backing on powerlines (local transmission of security, LANS, even audio!).
But alas, there's a snag! How do you cut a square/rectangular hole with ordinary tools? Sure, of course you can make four or more holes with your drill, dig out the jigsaw and cut out the extra metal, and finish up with some various sized metal files; all a lot of annoying and boring work, which is also time-consuming.
Or you can graduate to
The Nibbler!
When I found out about this tool, I fell in love! It does just what they call it, It nibbles out sheetmetal of almost any thickness or type, and its easy and fast.
Of course the metal handle isn't the most comfortable, but you can either wear a glove, tape on some rubber padding or apply insulating sheaths from a pair of pliers, or just MAN UP and cut the hole! Usually for one or two holes, you don't need to do much except mark out the size and nibble away!
To get started, you just drill a 3/8" or larger pilot hole to work the tool in to where it can start chopping. Be sure to use cutting oil to protect the sharpness of your Nibbler tool, which is going to become your favorite tool for cutting perfect rectangular shapes, refitting new parts which are the wrong size, etc.
Here the son gets an instructional hands-on in Nibbling 101. Soon the AC socket will be ready for power!
A final nostalgic look at today's accomplishments. Time to rest.
I don't want to tucker the boy out.
A few more internals, like caps, a bridge and a power-switch and fuse, and we'll be ready to wire up and test the output stage!
For that, all we need is a good tube-pedal (like one we built earlier) to drive the splitter, Output stage and transformer! Lets rock!


No comments:
Post a Comment