All about Tubes, Tube Circuits, Tube Gear
Showing posts with label Fender Chassis. Show all posts

Wednesday, June 20, 2012

Fender Rumble 60 Upgrade


I just inherited this Rumble 60, and I note it seems to have an 8 ohm Fender Special musical instrument speaker.  However, this speaker is actually undersize compared to a regular Fender 12", and seems to be only about a 40 watt speaker.

Note the small magnet.


The cabinet could use reinforcing,
and it looks like I could reinforce corners/edges inside,
seal the box and port too:


Bass Reflex Cabinet w. slot along bottom:


9" deep X 15 3/8" wide x 15 1/4" high (16 3/4" at back) interior box,

= 2140 cubic inches (1.24 ft³, .035 m³ )

with port/slot = 3/4" high x 16" wide, (12 Sq. In.)
and about 7" deep. (84 cubic in. in volume).


On the other hand,
The chassis for the Rumble 60 (at least this one) isn't made of Aluminium! It seems to be soft steel.

Its solid, rectangular and just about perfect for a small 2-tube push-pull power section.

I'd have to build a separate wood cabinet for it (Marshall-style).

Click the image to open in full size.

Somebody maybe already got that idea, and sold a chassis on Ebay.

I'm thinking, - now that the Rumble 60 has been discontinued,
and it has gone down from $500 new to about $200 or less used,
it makes a good start-pack for a 'champ' project complete with speaker cabinet!.

I don't know if this speaker would satisfy a guitarist,
but the chassis should satisfy a DIYer!

 Okay here's a closer look:
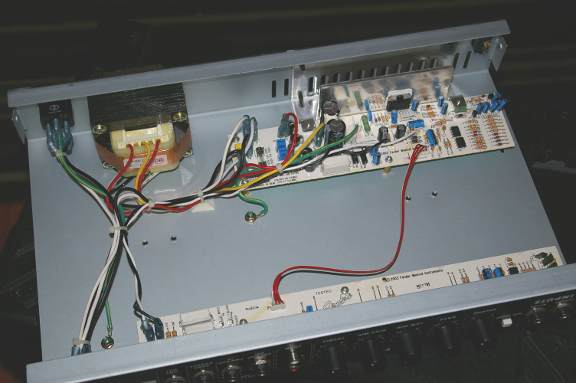
Click the image to open in full size.

16.5 " wide x 9.75 " deep x 2.75 " (at back. 2.25" front) chassis


______________________________

Recommendations for Amp:

Chuck integrated chip-amp,
and build tube amp on chassis, mount it in separate Marshall-style box.

Ok so the chassis is 16.5" wide (without any sides),
and 10" deep (ignoring transformer bulge and knobs).

I'm guessing a separate 'head' box will be:

(inside: 16.75" x 12" deep (allow for knobs/fuses) x 8" (3" + at least 5"))

Add 3/4" ply (x2) box:

18.25" x 12 (or 13)" deep by 10" high.
You can use the metal speaker-grill (cut) as a front/back grid above the chassis / knobs, to keep fingers out of front and back, and have plywood top, bottom and sides.
Carpet (or woodfinish) and corners as desired.

Makes for a sweet looking 60w push-pull head.


------------------------------

Recommendations for Speaker Cabinet:
 
As it is, the cabinet has a horrible "honk/peak" on the low E string (G,G#),
and another one about an octave higher (Gb, G, G# smeared).

Its a very uneven bass response, almost unplayable in certain areas of the fretboard!

The four-knob EQ doesn't fix this,- not even in the ballpark.


I'm thinking: put a real 200 watt speaker in it,
seal the port with a plywood block,
maybe add a midrange speaker (in separate compartment) + crossover.

Reinforce cabinet walls with crossbraces,
and foam 3 sides inside to stop standing reflections.

 To update:


I've added wheels (a necessity with any amp larger than a 10watt).

Also:

I reinforced the inside with a cross-piece horizontal pine board about 1" thick and 4" wide, edgewise toward speaker-back, cutting back-panel in half. Screws in sides and back and glue to hold.

I added a 16" piece of 2x4 in bottom, after removing fruity lightshow panel, right on bottom and right against port-hole inside blocking it: glued and screwed from bottom/sides (1.5" screws).
Long-screws were used on ends (from side).

I used a spray-can of insulating-foam, filling port, corners and edges all around inside box. Worked well.

I replaced speaker and tested:

The two main resonances were still there, (49 Hz and 98 Hz), but a little less bad. Much of the cabinent distortion on other notes however were cleaned up, so this cabinet reinforcement is really worth doing.

I went back to my buddy at The Speaker Store, asked about a notch-filter. This was not good news, as the cap/inductor combo would require 150 mH (HUGE if aircore) and 20,000 - 40,000 uF caps. The cost was unjustifiable, and the coil was made of unobtainium.

But the good news is my speaker expert recommended
stuffing the cabinet full of quilt-stuffing material to kill all standing waves.
So I gutted a 'comforter/pillow' and stuffed cabinet and replaced speaker:


...FANTASTIC!
The two main resonances were about 80% killed off (still a slight and noticable peak/resonance but the bass guitar was actually playable and the notes near the 'resonance' weren't all blended together and indistinguishable.

Also, the whole bass fretboard was not only playable but sounded musically awesome (especially two-note stuff and octaves)!

Bass Guitar amp went from pure honky crap to sonic bliss.

Pull all your bass woofers, reinforce sides and stuff the box full!
You will be amazed.

Now the amp actually doesn't sound so bad (for a transistor),
although the EQ is still crap.

In an ordinary room (practice, coffeeshops) it seems more than adequate.
Also seems to work good as a small guitar amp (maybe better than as a bass).

Still, speaker seems underpower for useful playing.

I'm now thinking of just adding a tube-circuit (12ax7 etc.) inside the box for an 'overdrive' channel:
You don't have to make a separate 'head' for this, to get a 'tube' sound.

I will get back again on this.

 "you mean, you sealed that .75" gap on the bottom of front?
isn't that needed to let the pressure out, so speaker won't blow up? "

Yes I blocked that, to get a smoother frequency response.


No, unless you are pumping ridiculous levels of power into it.

The sealed cabinet should limit the excursion somewhat,
protecting the speaker against physical overload.

I think there is some problems with paper-accordion surrounds (i.e., guitar speakers) handling extreme excursions of bass,
and supposedly the surrounds can tear.
It may be that this speaker (the original equipment) is susceptable to this, if pushed:
It certainly looks rather underrated (small magnet etc.) for a bass speaker.
But I think Fender would have put a speaker in that can handle bass,
since they contract speaker-makers to customize their speaker requirements.

I haven't overdriven it, but no one should with a small cab/speaker like this. Its strictly for practice and coffee-shops.

I was tempted to drop in a guitar-speaker (higher power) but resisted the temptation, since guitar-speakers are not made for bass-excursion.

I am still tempted to further modify the cab:

That is, put a Karlson-skirt on it to greatly amplify the loudness for a given wattage. If this was done properly,
the amp/speaker combo could probably power a rock-band / bar scene.

Monday, June 18, 2012

Ultralinear Guitar Amp (10): Transformers, Grommet!


Transformers, Grommet!


 Yes, whenever you mount transformers to a chassis, always have plenty of rubber grommets to protect the wiring insulation from abrasion, cuts, and short-circuiting!  Especially with high voltage stuff.


First Transformer goes on the Chassis!  Output tranny at one end, and power supply trannies and chokes at the other.  Orientation aint so critical with this incredibly long chassis.


 I always seem to be short of lock-washers.  Ideally locknuts would be even better, but hey, we'll be using what is on hand for this economy build.  When you run out of washers, you can always use nail-polish to fix nuts from loosening, that are never supposed to come off again.  Transformers are one of those parts that should never die!


The second (Power/HV) Tranny goes in the corner.
Here my son is drilling the holes for the massive choke (larger than the Power Tranny!).  We had to check for clearance with the speakers in the Fender cab.


After this quick training exercise, my son is now a professional Grommeter!
It first seems impossible to stuff correct-size grommets into the hole, And in the past I've even cut them to assist in tucking them in.  But the best tool for this is simply a medium flat-head screwdriver.  You have to watch it, so that the rubber isn't penetrated or torn, since that defeats the whole (hole) purpose of protecting the wires from contact with sharp metal edges, and also providing electrical insulation.


Power Plug Innovations:

Next we want to get the power chord installed.  But here, instead of the usual fixed line, we want the new 'computer-plug' style.  There are several good reasons to go this route:

(1)  If the chord is damaged, its an easy replacement, without tools!

(2)  You can change the length of the power cord, if you want to add a longer one!

(3)  There is built-in powerline filtering in most of these units, which is pretty essential these days with tons of digital broadcast noise all around, (cells, internet etc.) and all kinds of equipment piggy-backing on powerlines (local transmission of security, LANS, even audio!).


 But alas, there's a snag!  How do you cut a square/rectangular hole with ordinary tools?  Sure, of course you can make four or more holes with your drill, dig out the jigsaw and cut out the extra metal, and finish up with some various sized metal files; all a lot of annoying and boring work, which is also time-consuming.

Or you can graduate to

The Nibbler!

When I found out about this tool, I fell in love!   It does just what they call it, It nibbles out sheetmetal of almost any thickness or type, and its easy and fast.
Of course the metal handle isn't the most comfortable, but you can either wear a glove, tape on some rubber padding or apply insulating sheaths from a pair of pliers, or just MAN UP and cut the hole!  Usually for one or two holes, you don't need to do much except mark out the size and nibble away!


To get started, you just drill a 3/8" or larger pilot hole to work the tool in to where it can start chopping.  Be sure to use cutting oil to protect the sharpness of your Nibbler tool, which is going to become your favorite tool for cutting perfect rectangular shapes, refitting new parts which are the wrong size, etc.


Here the son gets an instructional hands-on in Nibbling 101.   Soon the AC socket will be ready for power!


A final nostalgic look at today's accomplishments.  Time to rest.
I don't want to tucker the boy out.


A few more internals, like caps, a bridge and a power-switch and fuse, and we'll be ready to wire up and test the output stage!

For that, all we need is a good tube-pedal (like one we built earlier) to drive the splitter, Output stage and transformer!   Lets rock!


Thursday, June 14, 2012

Ultralinear Guitar Amp (9): Tube Holes!


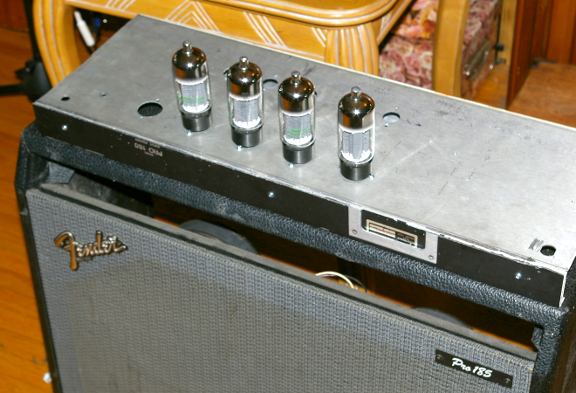
Starting to prep the Chassis!

Here's the latest pics of the build:


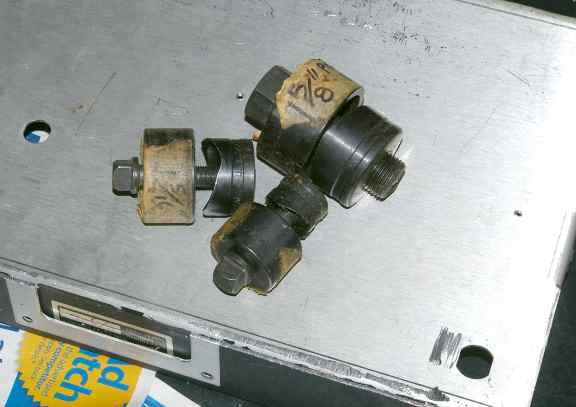
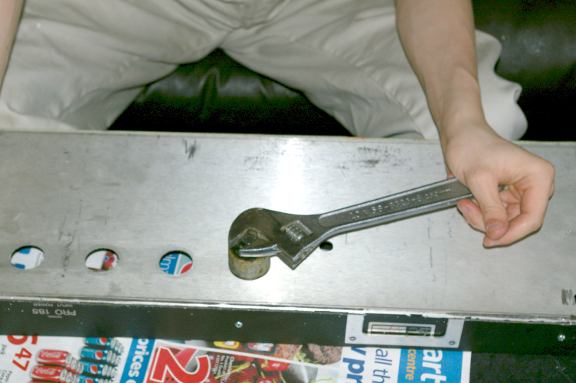
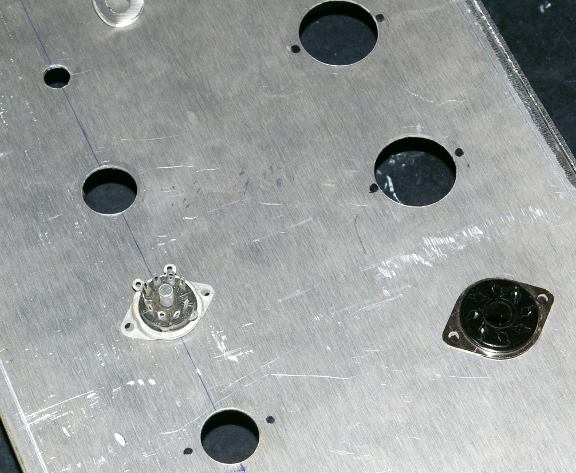
These hole-punches are a lifesaver.
They pay for themselves with their first use.
Make sure you use cutting-oil and regular oil on the threads, to keep them sharp.


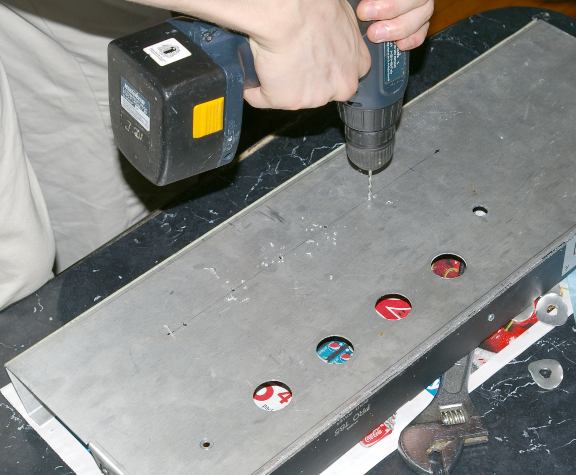
For accurate hole-placement, small pilot-holes are drilled, then a 3/8" hole for the bolt of the hole-punch.
A half-dozen turns and the piece snaps out, leaving a perfect, finished hole.


Even if this project is a flop, nothing beats watching the son actually perform useful work!
- and he's gained experience with a new tool, the hole-punch.


Holes for the mounting bolts are also marked and drilled.


Really nothing should be mounted until the transformers are drilled and bolted on,
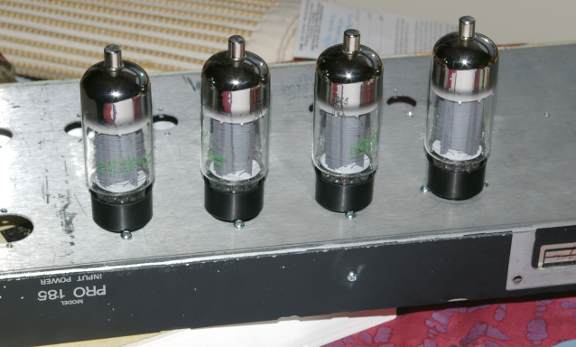
but its hard to resist the fun of pre-assembly and a first look:


Ultralinear Guitar Amp (8): Chassis Prep (cont.)

Nothing like actually getting down to business!

The chassis needed one more modification.
The extra long back was sawed off, leaving about an inch;


The extra piece was also sawed short, to match the height;

This piece has the bend and chassis-bolt nuts which take the back bolts from above.


The piece is bolted to the rest of the chassis, to give a strong,
level surface for mounting the transformers and tubes.

As a result, new holes will have to be drilled in sides of the wooden Fender cab, to line up with the side-bolts.

Good news is, most of the front panel can be re-used, the old way,
with chassis-mounted knobs and point-to-point, using a turret board.


Here's a closeup of the Boltec 100watt UL transformer, with painted bells.
The 'burnt look' was created with a crackle-paint, sprayed lightly over the white.
It gives a hint of the mayhem to come from this best guitar-amp ever built (tribute).


Now the fun begins! LAYOUT Time!


Nothing like a new amp project to get you all fired up!

Click the image to open in full size.

Remember kids! Play Safe!

Click the image to open in full size.

Ultralinear Guitar Amp (7): Chassis Setup

because they are hanging upside down.

First these ones, which grip the base:

Click the image to open in full size.

Then these ones, to hold those babies in regardless of roady mishaps.

Click the image to open in full size.

I know: You're saying, "Why both?"

Because I don't trust either method.

Of course this brings to mind the train scene in Once Upon a Time in the West.

Frank: "How can you trust a man who wears both a belt and suspenders? The man can't even trust his own pants. "


My only misgivings are the potential for shorts/arcing from metal retainer to topcap clip/plate (with 6BG6As).
I may have to use an additional silicon (for heat resistance) insulating ring with a ridge.

Okay, starting to get down to business:

I have stripped the original Fender Transistor Twin chassis,
and spent a week toying with the idea of taking it to a school shop,
and using their bender to fix it up.
Then I just spent ten minutes with a 2x4 and my body weight,
bending it myself on the floor. Not bad.
Now the chassis platform is horizontal,
and the front piece bent at an appropriate angle.
I have yet to saw the over-tall back piece off and re-bolt it,
so that the top-screw lugs line up with the holes in the cabinet.


On the left (chassis) is the Boldec 100 watt Ultralinear transformer.
The bells were painted white and fired for coolness (wasted now inside Fender cab).
On the right (chassis) is the HV tranny and the giant (10 H?) choke (bigger than tranny!).
I got this choke I think from Antique Audio 20 years ago as army surplus.


But I thought the only way to get the son started (and off videogames),
was to dump it on his bench, and make a lot of noise.

I built a bench for him under his bed-loft, (see pic),
to encourage him to learn some electronics before his dad goes senile.


He inherits a lot of cool bits, like that classic EICO oscilloscope,
and custom test-jigs for tube circuits (see upper left).

Some might recognize the ancient Heathkit tone-generator at top right,
and the quickly obsceletized "Distortion Meter" beside it (heh heh).